
Continuous integration and static code analysis
Continuous integration deals with merging code implemented by multiple developers into a single build system. Developers frequently integrate their code and the final build is automated, developer unit test are executed automatically to ensure the stability of the build. This approach is inspired by extreme programming methodologies. With a test driven approach put into place continuous integration would yield in the following benefits.
- Identifying bugs and issues immediately as they arise.
- Automated deployment and configuration to minimize manual deployment time.
- Supports in generating documentation (Java Docs) automatically as post build steps.
- Identifying conflicts in changes integrated.
- Easier revert back to stable builds.
- Metrics which provide code complexity and coverage.
Static code analysis analyzes source code for common coding standards and guidelines and notifies common code smells. Static code analysis performs analysis on uncompiled, unexecuted code. Even though there are extensions and tools for IDEs that allow individual developers to perform static code analysis, its important to note that integrating with continuous integration tools allows a more consistent an uniform analysis for all developers.
In this post we would be taking a closer look at setting up a Jenkins server, which would be the continuous integration tool, with SonarQube a static code analysis tool. The figure below illustrates how all of the tools would fit into place.

Individual developers would commit the code to a code repository. Jenkins would make checkouts of the code from the repository and would perform automated builds and would execute unit tests. During this process it would run a sonarqube runner which ultimately integrates the static analysis results to the SonarQube dashboard.
The SonarQube dashboard and the Jenkins server can be deployed as two separate components. The SonarQube Jenkins plugin ultimately executes the sonar runner to integrate the code to the sonar dashboard. This automated process can be repetitively performed at scheduled intervals.
Installing and configuring SonarQube
Navigate to http://www.sonarqube.org/downloads/ to download the latest version of SonarQube. Once downloaded extract the archive to a desired location.

The folder structure is organized to contain the binaries, configurations, extensions, logs and the dashboard web area.
Navigate to the conf folder. The conf folder consists of two configuration files, wrapper.conf and sonar.properties. Wrapper.conf contains JVM settings for the SonarQube server, such as memory limits JVM paths.
The sonar.properties contains configuration of the sonarQube server.
By default the SonarQube server makes use of an embedded H2 database. This configuration is not recommended for a production environment. The figure below lists the Sonar configuration file. The file contains configuration for different types of databases and the required type of database configuration could be enabled as required.

Once the required configuration changes have been made, to launch the Sonar Server navigate to the bin folder to find the binaries required. This folder contains specific sub folders based on the operating system been you wish to deploy on. Select the relevant folder structure, in this case we would be using windows-x86-64.
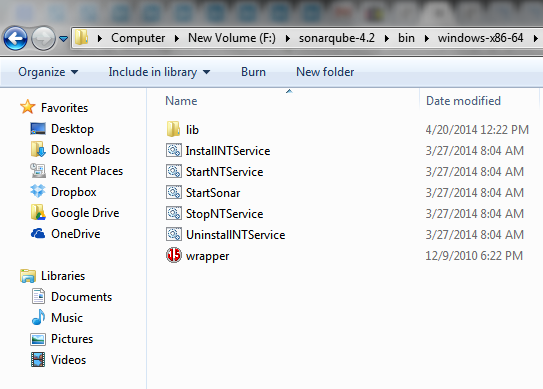
As you could see in the figure there are separate batch files for managing the server as a windows service or to launch it in console mode.
Install the service using the install service batch file. Then navigate to the windows services section by launching Run > services.msc . Start the sonar service.
If the service fails to launch try troubleshooting by referring the log file logs/sonar.log file.
Issue

The issue as above could be solved by changing the identity of the service. By default the sonar service is launched as the system user account. Changing the identity to an account having permission to the file in the error would get the service up and running. In my instance I selected the Network Services account.
Solution
Right click of the Sonar Service on the Services manager and select properties and navigate to the Logon tab and select the desired identity as listed below.

Once the service has been successfully launched, navigate to the sonar dashboard to verify. The default sonar dashboard URL would be http://localhost:9000/dashboard/index/1. This completes the Sonar Dashboard setup.
Now lets setup a Jenkins server and automate releases from it into SonarQube.
Installing and configuring Jenkins
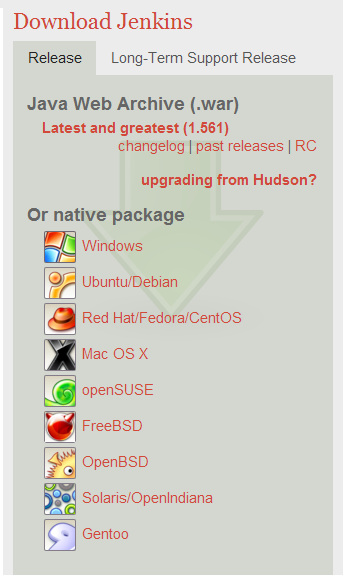
To get started navigate to the https://jenkins-ci.org/ URL and select a native package.
Extract the package and run the installer. This would setup Jenkins. Launch the browser and point to
Next navigate to Manage Jenkins then Manage Plugins. This section allows to install the SonarQube plugin for Jenkins. From the available section search the SonarQube Plugin.

Once the installation is complete navigate back to Manage Jenkins then Configure System
This would launch the Jenkins configuration. This section allows to configure compilers, configuration of existing plugins and Repository settings.

Configure Build tools such as ANT, Maven and the JDK versions that are needed to build the project. The figure below shows a sample setup of the global parameters, JDK versions, environment variables can be configured here. JDKs could be automatically downloaded and configured via Jenkins itself.

After installing the Sonar plugin in the configuration section there would be a separate section for Sonar Server configuration. The Sonar section allows to configure Sonar Server URLs, database configuration for the sonar server and user credentials.

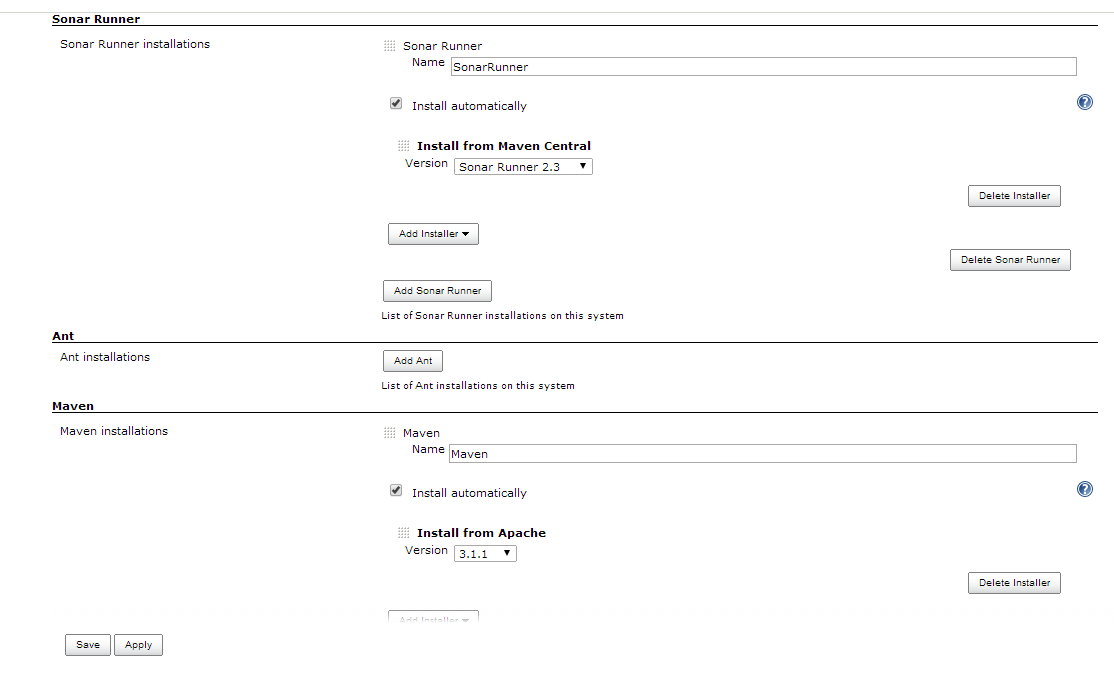
The next section that needs to be configured is the Sonar Runner. This could be configured to automatically downloaded and installed from Maven central. The figure below contains the configuration of a the Sonar Runner.
Creating a project in Jenkins
Navigate to the Jenkins home and select New Item to start off with a new project. Based on the project type select a type of configuration. Once the project is created the following could be configured in it.

General configuration consists of the item name and the item description. and the JDK version used.
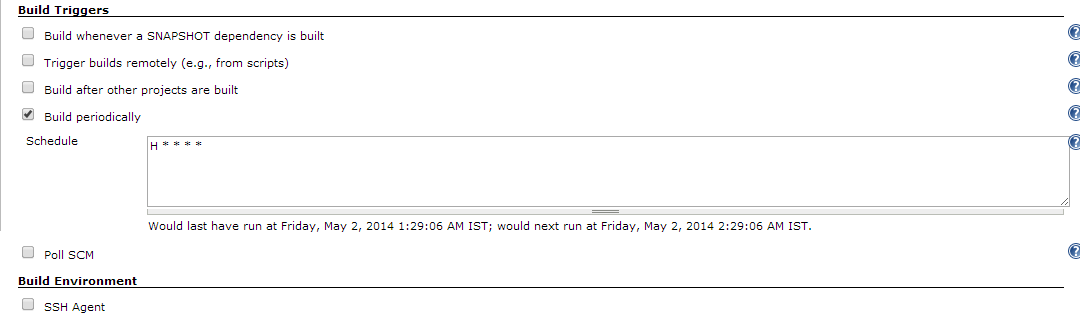
Another important configuration section consists of the build settings. It provides configuration to schedule the build.
Once the build scheduling is configured, a code repository needs to be provided to checkout the code. The figure below consists a snapshot of the configuration related to different code repository configurations.

Finally configure the Sonar runner with the desired project related sonar.properties as explained earlier. Once this is configured the entire integration is done.

After the following configuration steps a build could be executed to verify the integration. If properly integrated the Jenkins log would show traces of SonarQube Runner execution and the results could be found at the sonar dashboard.

Hey,
An excellent guide.
I recommend you to visit this website http://clinkerhq.com
Clinker is a Software Development Ecosystem ready to user. Based on open source tools.
Regards,
Hi Manuel,
Thanks for the link, and for the appreciation, I will check it out
Nice Tutorial, Keep it up.. 🙂
Thanks! 🙂
very nice tutorial, will definitely recommend to others 🙂
Thank you for your kind comment, I’m glad it was useful to you 🙂
Any idea how jenkins sonar plugin can be incorporate with a web(angular js) project which has a bower.json for dependency management.
Hi Harshana,
Interesting question, Normally Jenkins does not allow its plugins to be accessed from outside. What you could try is to setup a Jenkins task with the required configuration and then use an automated approach listed here http://www.ittybittytalks.com/how-to-automate-your-jenkins-build-script/
To execute your task and then make it output a result that you could serve back to your Angular application.
Just as i was looking for a new project. I am trying to get a hang on to sonar.
Can the jenkins build be made to fail based on the sonar report?
You could try installing the Build Breaker Plugin for Sonar which could automatically trigger a build break at the CI level. http://docs.sonarqube.org/display/PLUG/Build+Breaker+Plugin
That plugin is no longer available. With the current version of Sonar I couldn’t find any solution for breaking the build. Looks like they’re planning to release it as a core version in 6.x, but until then …
So you should use an older version of Sonar for this to work.
It is still possible to break the build without a plugin. Using the Web-API and a defined Quality Gate is all you need. And a shell script which runs after the Sonar Scanner:
sleep 10
url=$(cat $WORKSPACE/.sonar/report-task.txt | grep ceTaskUrl | cut -f2,3 -d “=”)
status=$(curl -u $SONAR_LOGIN:$SONAR_PASSWORD $url | jq .task.status | sed -e ‘s/^”//’ -e ‘s/”$//’)
if [[ “$status” == “SUCCESS” ]]; then
analysisId=$(curl -u $SONAR_LOGIN:$SONAR_PASSWORD $url | jq .task.analysisId | sed -e ‘s/^”//’ -e ‘s/”$//’)
else
echo “Sonar Run was not successful. Please check your Code.”
exit 1;
fi
analysisUrl=”http://SonarURL:8080/api/qualitygates/project_status?analysisId=”
quality_gate_status=$(curl -u $SONAR_LOGIN:$SONAR_PASSWORD $analysisUrl${analysisId} | jq .projectStatus.status | sed -e ‘s/^”//’ -e ‘s/”$//’)
if [[ “$quality_gate_status” == “OK” ]]; then
echo “Quality Gate Validation passed”
else
echo “Quality Gate Validation failed”
exit 1;
fi
Try it.
Best regards
Alex
Thanks Alex for the script and for outlining the Web-API approach
Do I need to download any plugin for sonar-runner?
No the Sonar-runner is now called the Sonar Scanner you can download it here Sonnar Scanner Documentation and Download
Hello: I set up in the project sonarqube, but can’t jump straight to the sonarqube error list, how be to return a responsibility excuse me? thank you
Can someone advise how i can send Sonar Metrics coverage Report in email instead of displaying in Dashboard?
to run sonar job after the completion of the above jobs. The jobs should automatically take the parameters